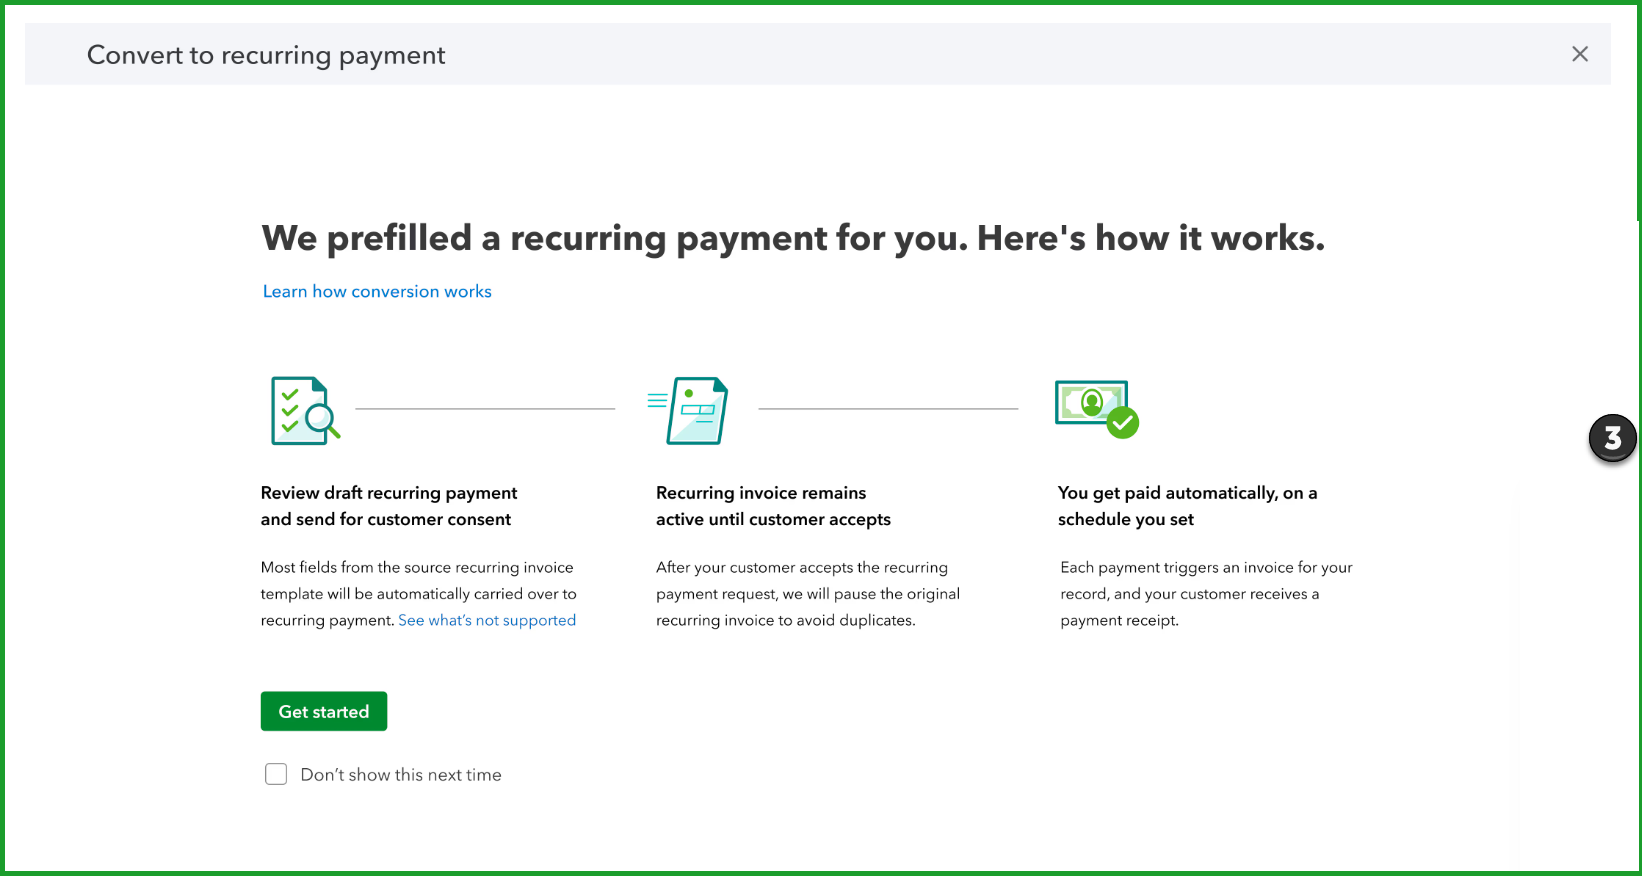
Did you know you can convert recurring invoices into recurring payments in QuickBooks Online? This not only means less hassle and headache for you and your clients but also helps promote predictable cash flow.
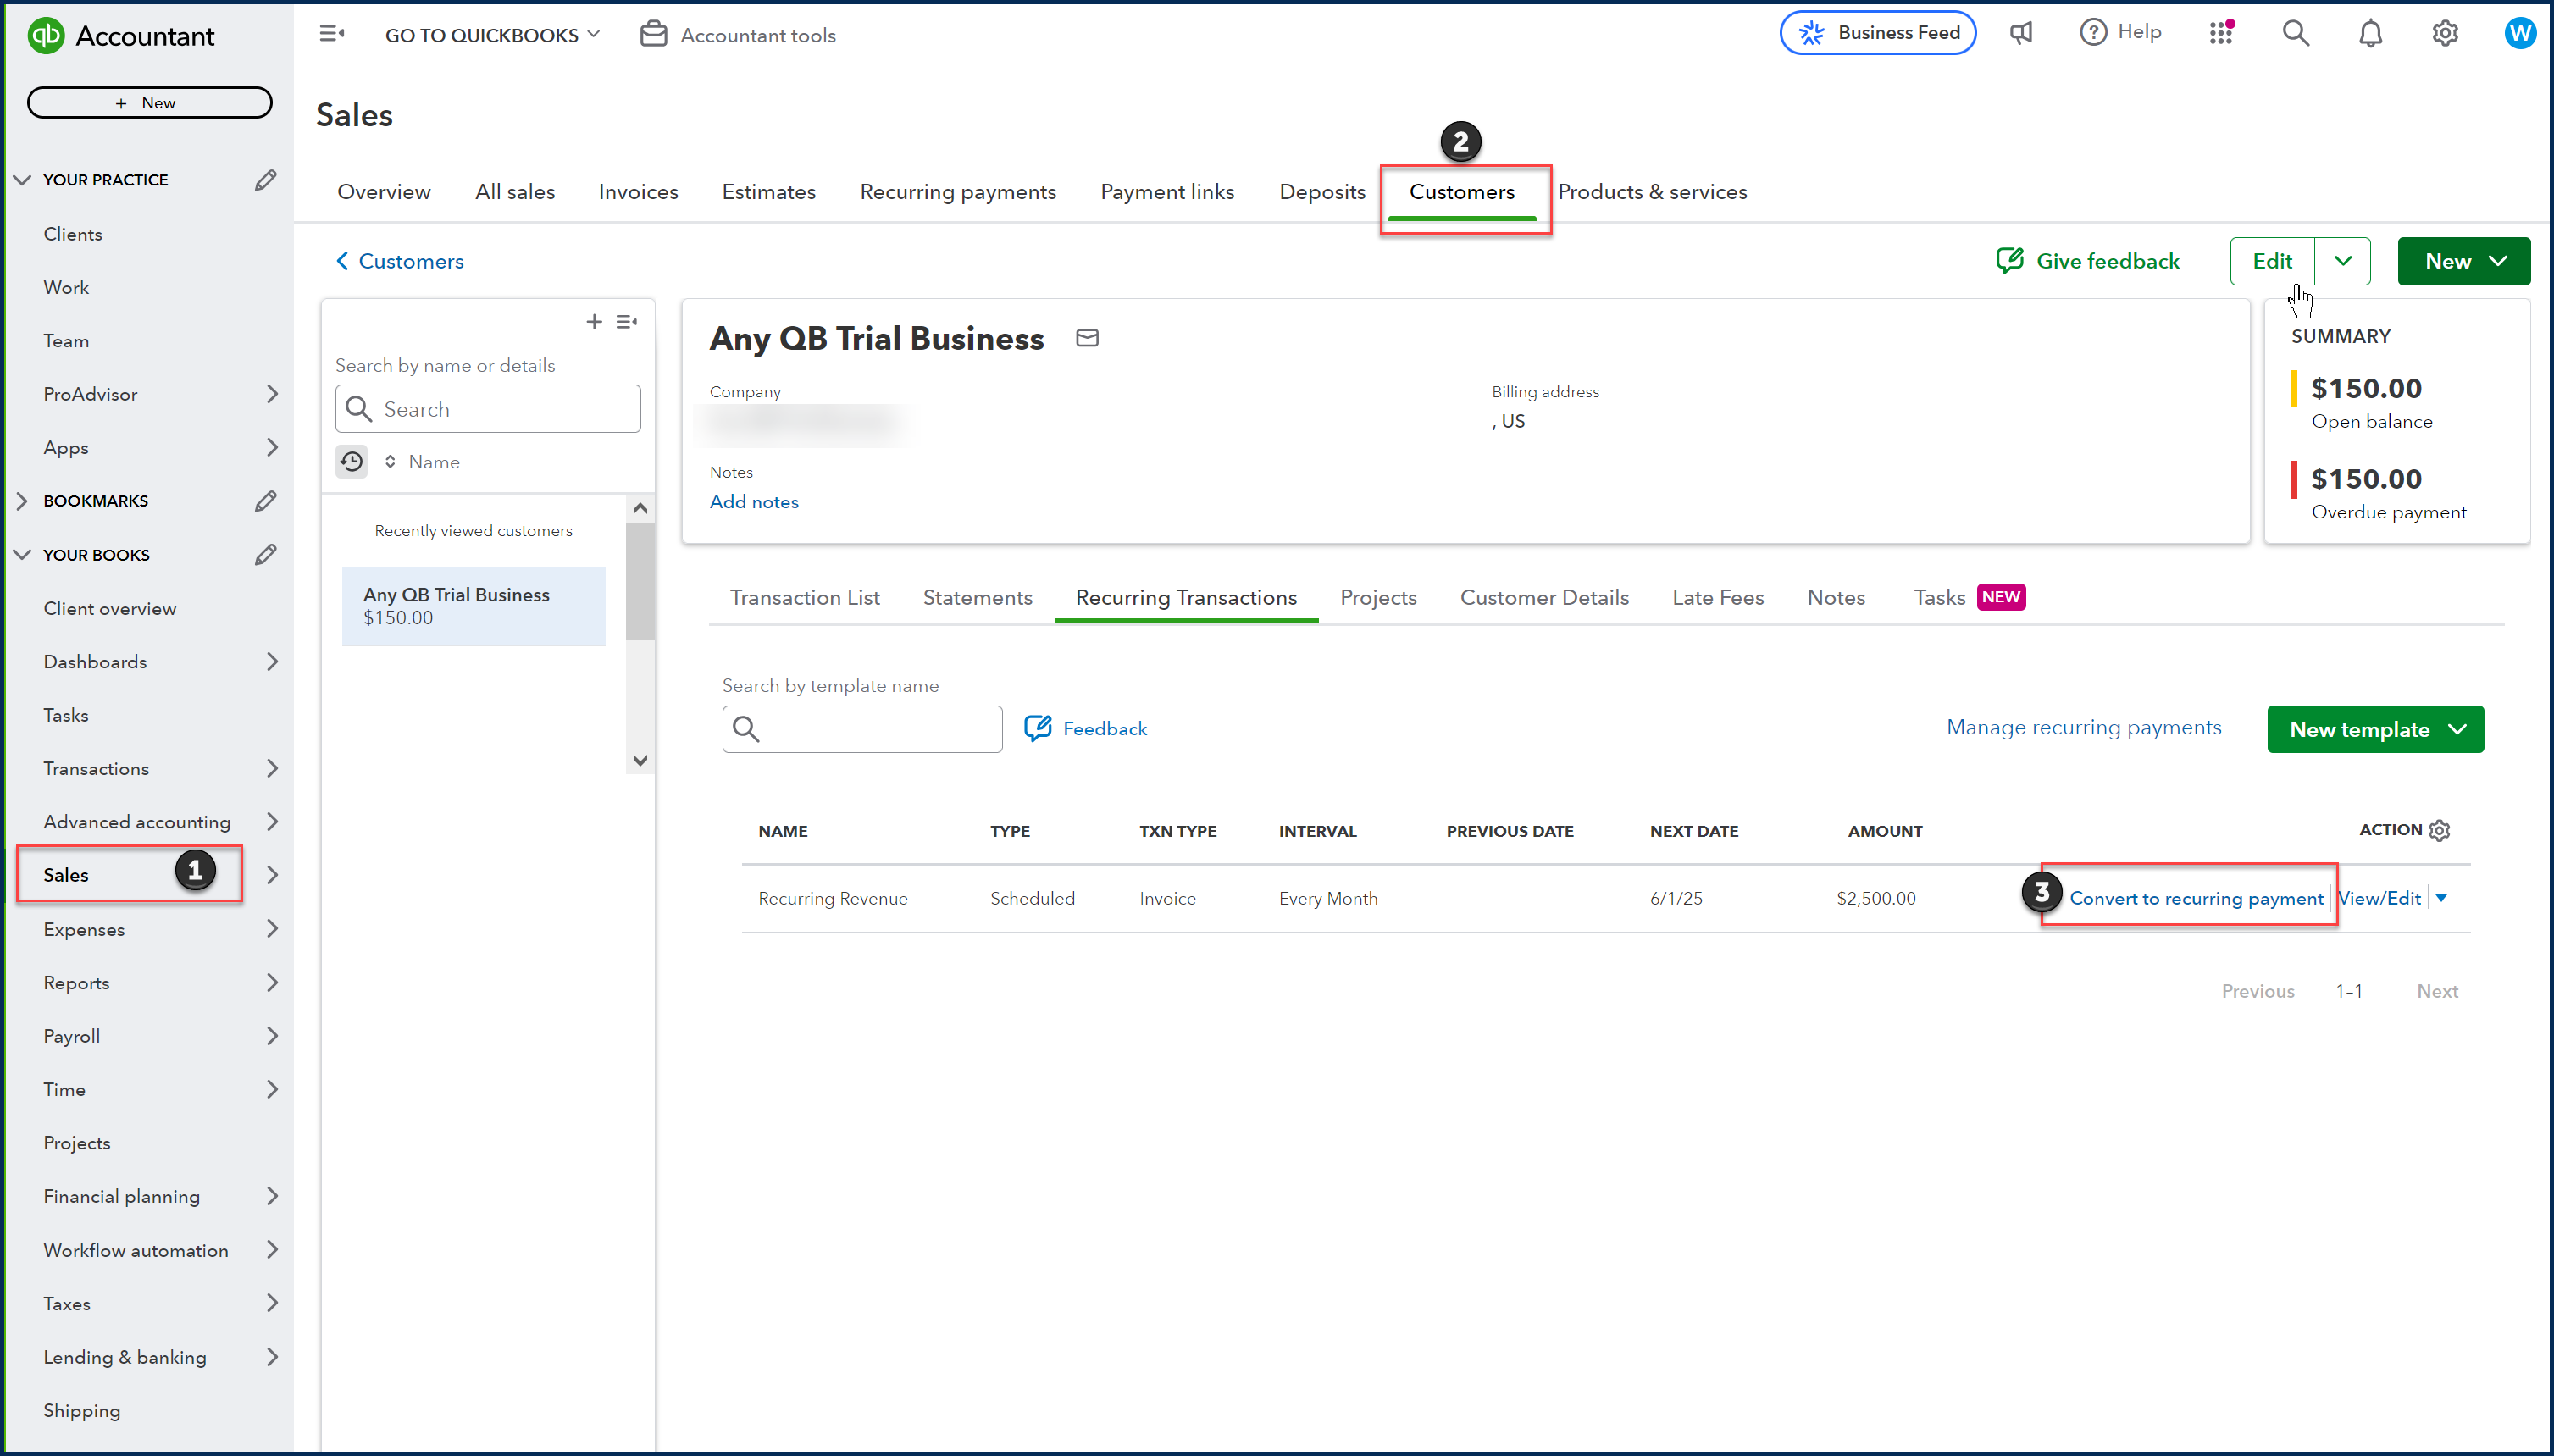
To summarize the process. Initially, you create a recurring payment from a recurring invoice in the Customer section of the Sales tab.
Then you send the recurrent payment to the Customer as a payment request. After the Customer agrees to the recurring payments, they can enter their payment information through the secure QuickBooks Online portal. With every payment received through QuickBooks, your books will update automatically.
(Source: Intuit media source content)
To use recurring payments, you must have an active Merchant Services Account. QuickBooks Payment rates apply to each payment made using recurring payments; however, there are no separate or additional charges to create recurring payments.
Let’s look at this process more closely. Begin by converting a recurring invoice to a recurring payment:
1) Sign in to QuickBooks, then go to Sales.
2) Select Customers, then select Recurring transactions.
3) Select Convert to recurring payment.
4) When the Recurring Payment form opens, it will be pre-filled with your Customer’s details*.
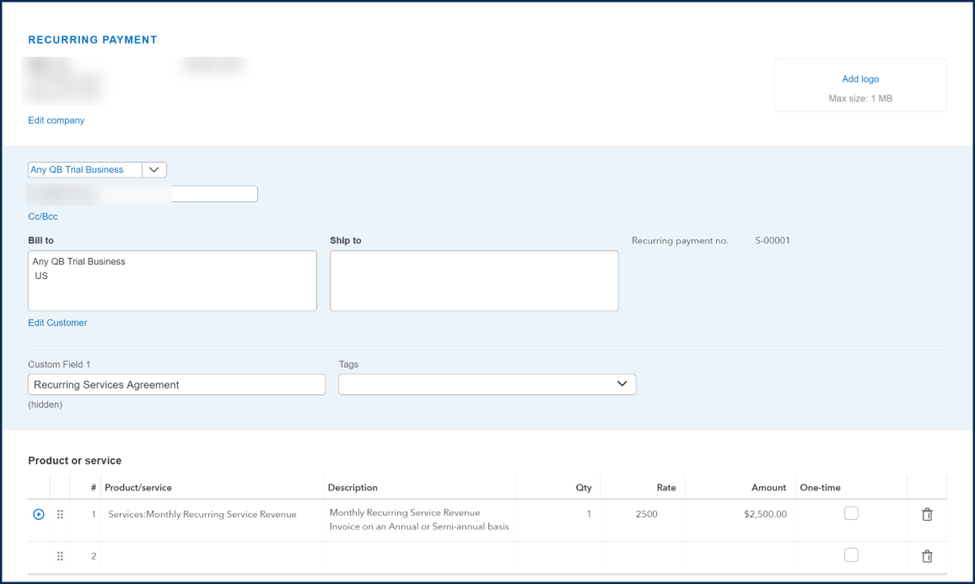
5) Review the information on the Recurring Payment form, then select Review and send.
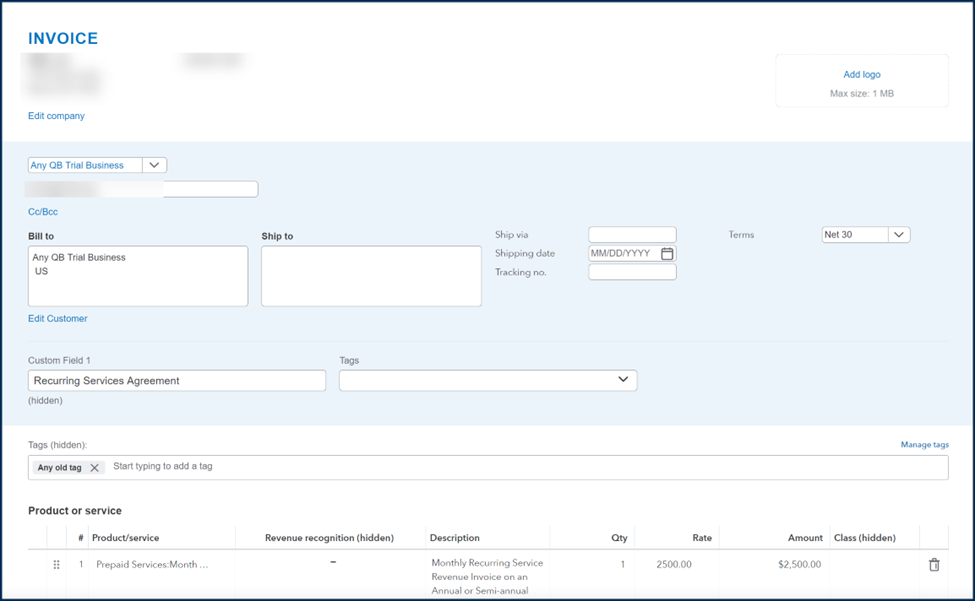
(You will see that the Recurring Payment shown under # 4 is identical to the information shown in the above Invoice.)
6) Enter a Message for your Customer, then select Send recurring payment.
7) Once you select send recurring payment, QuickBooks sends a consent request to your Customer.
8) If the Customer agrees, QuickBooks automatically pauses your recurring invoice, and the recurring payment is active. QuickBooks then creates an invoice and automatically matches it with the payment received from the Customer.
Note: If the Customer does not accept the recurring payment request before its expiration date, which is the date of your next scheduled recurring invoice, your original recurring invoice will remain active, and the recurring payment will expire.
*- Certain fields from recurring invoices are not supported when you make recurring payment requests to a customer. These include custom fields, classes, locations, attachments, notes, memos, and unbilled charges. In addition, fields like print-later or create # of days in advance are not supported when converting recurring invoices to recurring payments.
Disclosures:
Feature content was adapted from Intuit Help' and other media source content within QuickBooks Online Accountant. Content created or otherwise adapted by Insightful Accountant from Intuit source content is furnished for educational purposes only.
As used herein, QuickBooks®, QuickBooks Online Accountant and QuickBooks Payments refer to one or more registered trademarks of Intuit® Inc., a publicly-traded corporation headquartered in Mountain View, California.
Other trade names or references used herein may refer to registered, trademarked or copyrighted materials held by their respective owners and included for informational and educational purposes only.
This is an editorial feature, not sponsored content. No vendor associated with this article has paid Insightful Accountant or the author any form of remuneration to be included within this feature. The article is provided solely for informational and educational purposes.
Note: Registered Trademark ® and other registration symbols (such as those used for copyrighted materials) have been eliminated from the articles within this publication for brevity due to the frequency or abundance with which they would otherwise appear or be repeated. Every attempt is made to credit such trademarks or copyrights within our respective article footnotes and disclosures.