QuickBooks Online Accountant now lets you create custom a Client number (aka: Client ID) in it’s own unique field to track clients with internal identifiers you and your firm currently use.
Previously, many firms used a 'custom field' for this purpose, limiting the total number of custom fields available for other purposes.
The new Client Number makes it easier to locate and navigate their QuickBooks data and streamlines client management by allowing you to associate your internal tracking numbers with the client’s QuickBooks information.
Implementing custom Client-IDs can significantly enhance your client management and workflows within QuickBooks Online Accountant by providing:
- Enhanced Tracking: Keep track of your clients using your own numbering system or internal identifiers.
- Retrieve Data Faster: Locate clients quickly using their custom client number, rather than relying solely on their name.
- Maintain Data Consistency: Match client information across different systems you might use, such as a customer relationship management (CRM) system.
To use this Client-ID feature:
(1) Login to QuickBooks Online Accountant: You must have a role that permits you to add/edit clients or edit specific clients.(2) Access Client List:Select Clients on the left-hand navigation menu QuickBooks Online Accountant.
 (3) Choose a Client: From your existing Client list, select the "Client" you want to add a ‘Client number’ to.
(4) Edit Client: Select "Edit client" from the Action column.
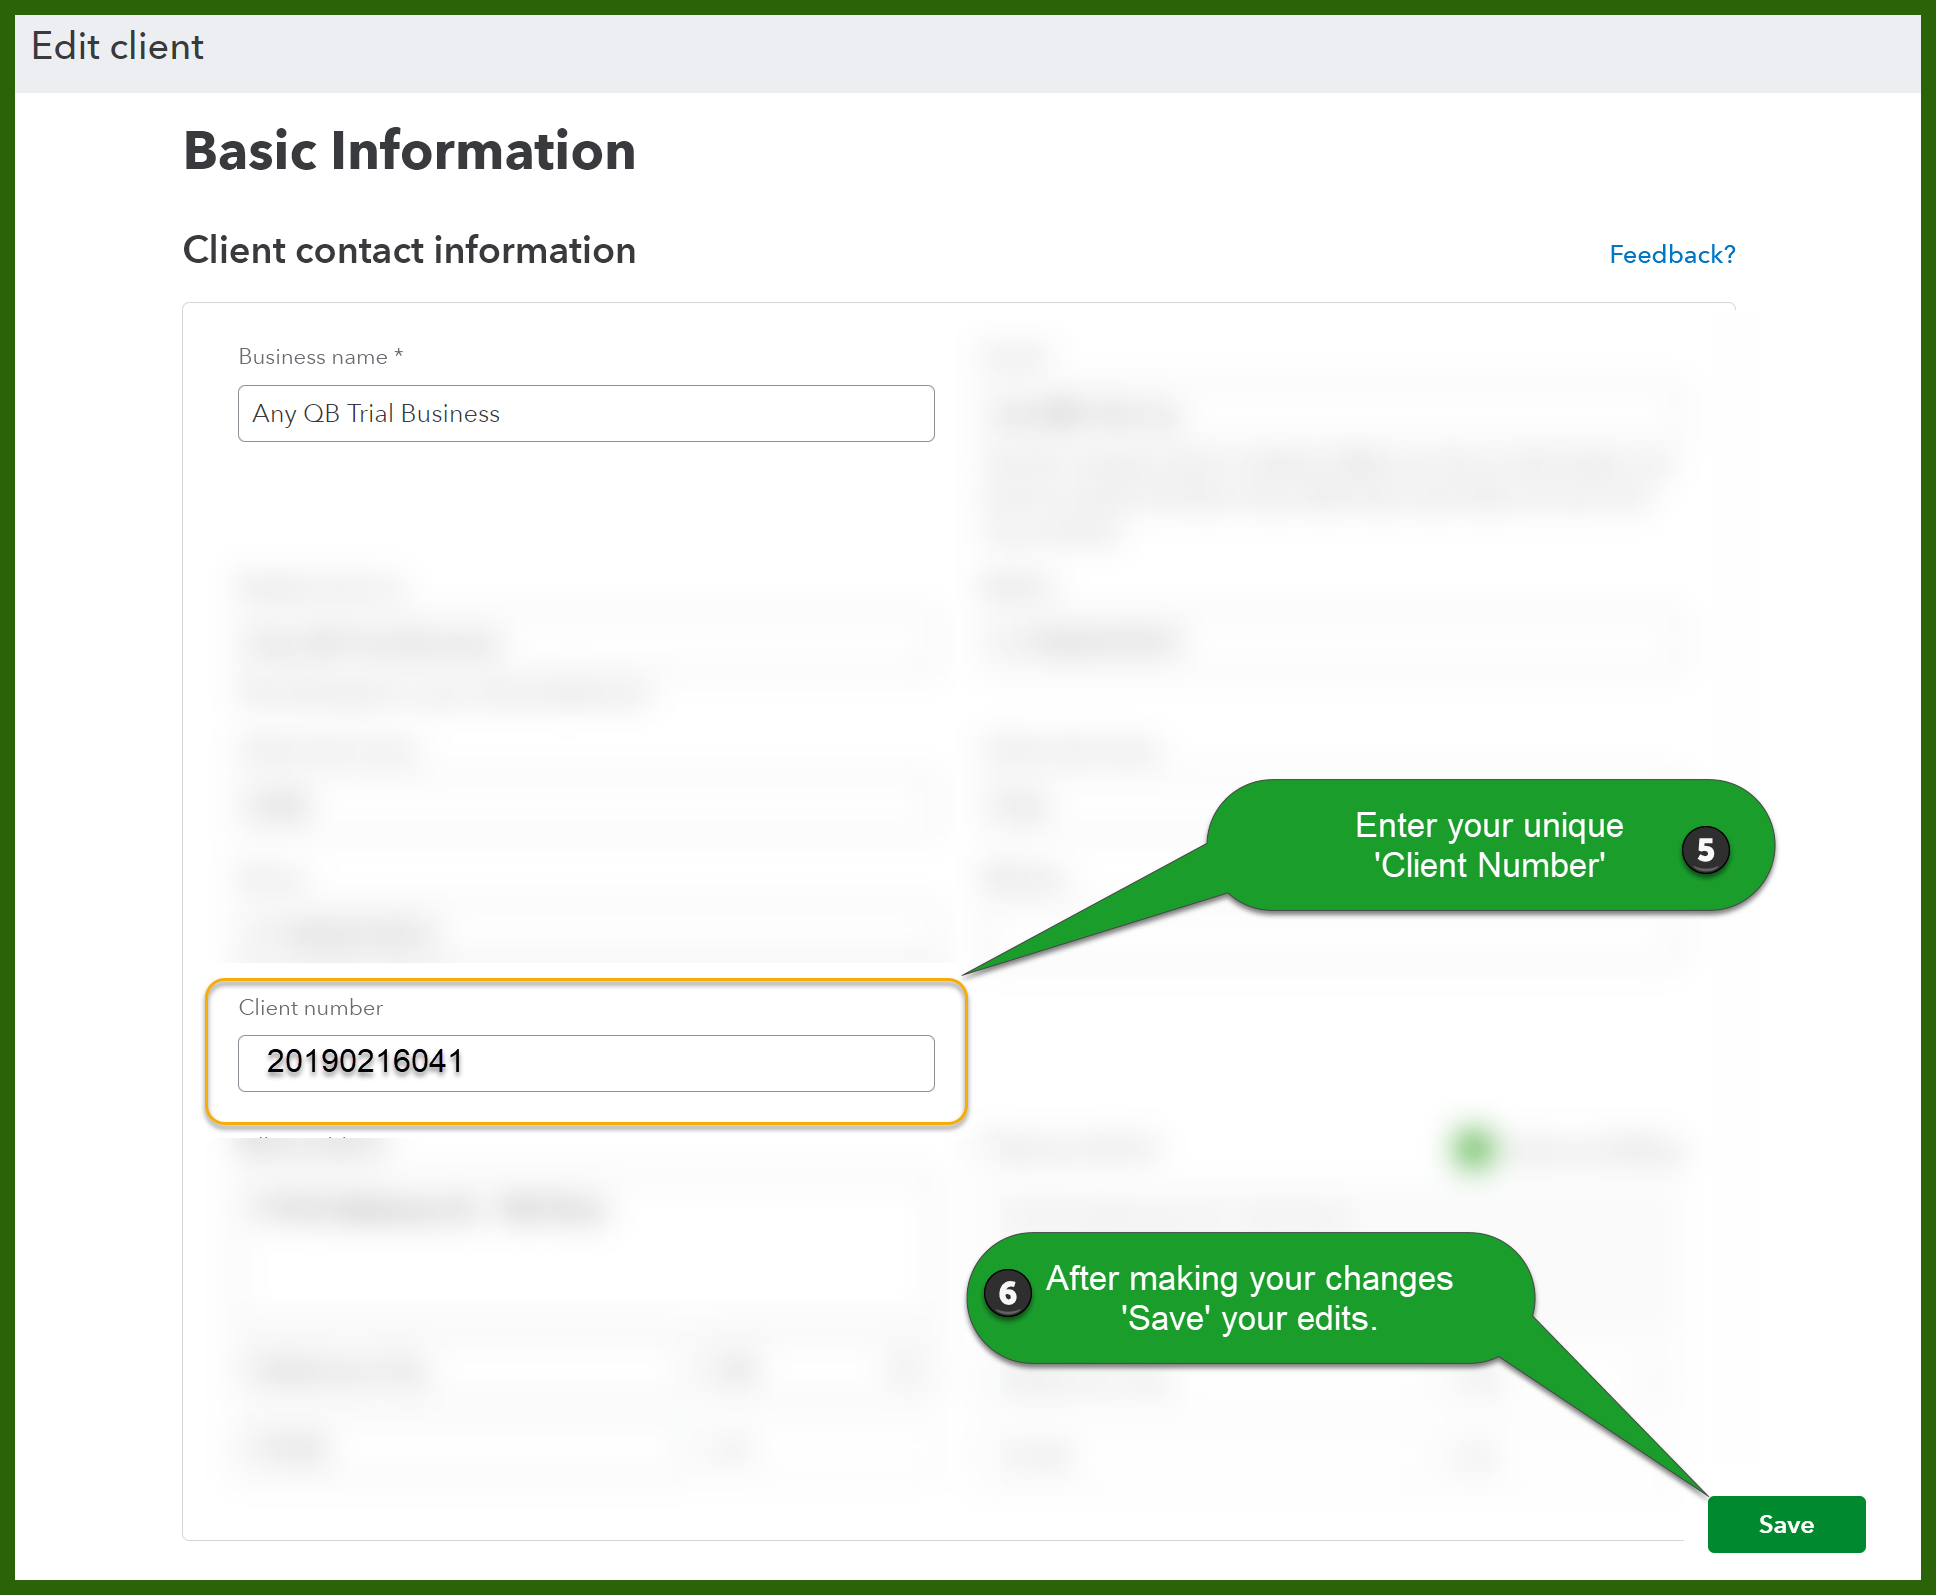
(5) Enter the Client number: When the Edit client window opens, locate the "Client number" field within the Client Basic Information section. Enter the unique "Client number" you are using internally.
(6) Save Changes: Ensure you "Save" the client information to store the custom ‘Client number’.
Customizing your Client list for Client Numbers
You can choose to add the Client number field to your Client list within QuickBooks Online-Accountant. You can also choose where you want the field to appear in the list.
- Select "Clients" under Your Practice.
- Select
 "Customize".
 - Choose "Columns".
- Check the "Client number checkbox".
- Drag the Client number field where you want it in the Client list.
Conclusion
Intuit and the QuickBooks Online-Accountant team have provided a new method by which users can track their clients and associate them with other systems that automatically assign numeric tracking numbers. You can also use the Client number in the Client list to help you quickly identify your client, or confirm their identity.
Topics from this blog: QuickBooks Online Accountant QBO Monday Minute